
If you’ve always dreamed of having a pool at home, but think the cost is an insurmountable obstacle, this post is for you! I’ll show you how I built my masonry pool in a practical and economical way, without sacrificing quality and safety. Follow this step-by-step guide to understand the entire process and the materials used.
Here, I share details about the construction process, from choosing the materials to the total cost, so you can plan and build your own pool without any worries. Let’s dive into this construction journey together!
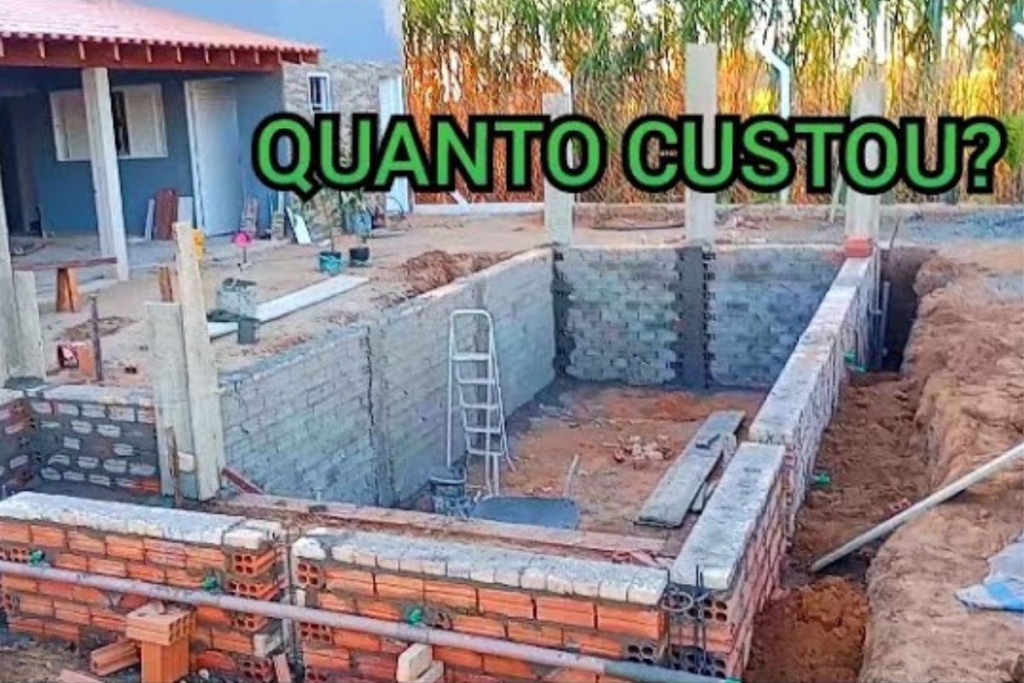
Masonry Pool Construction Structure
Initial Planning
Before starting any construction, it is crucial to have a good plan. Here, we define the space, choose the materials and calculate the costs. The first step is to choose the ideal location on your land, taking into account the incidence of sunlight, the proximity of trees and the distance from the filtration system.
- Location Selection: A sunny spot away from large trees is ideal to keep the water cleaner and more pleasant.
- Sizing: Set the size and depth of your pool according to your desired use. A recreational pool is typically 1.40m deep.
- Necessary Materials: Blocos de alvenaria, cimento, ferro 5/16, estribos, areia grossa e pedra 1/4.
Land Preparation
To prepare the land, we started by excavating, without the need for foundation beams, since the structure will not have significant weight on top. The soil was well compacted to ensure stability.
- Excavation: Excavate the site to the planned dimensions. Make sure the side walls are smooth and well compacted.
- Soil Compaction: Use a compactor to ensure the ground is firm and stable, reducing the risk of future shifting.
Structure and Reinforcement
The main columns were made with solid 2.40 meter ironwork, ensuring the necessary strength to withstand the water pressure. We passed an iron strap around the base for greater stability.
- Hardware Assembly: Use solid, seamless hardware to ensure strength. Columns must be at least 1 meter deep in the ground.
- Reinforcement with Iron Strap: Pass a 5/16 iron strap around the base and columns to lock the structure.
Assembling the Blocks
We used eight-hole blocks laid flat to increase strength. The bottom of the pool was reinforced with a 5/16 iron strap, ensuring that the structure could withstand the lateral pressure of the water.
- Block Settlement: Place the blocks lying down for greater resistance. Lay them with a well-prepared cement mortar.
- Additional Reinforcement: Add one more iron strap on top of the blocks to ensure the structure can withstand the water pressure.
Waterproofing and Coating
After assembling the structure, it is essential to waterproof the pool to prevent leaks. Use an asphalt blanket or a product specifically for swimming pools.
- Waterproofing: Apply waterproofing to the walls and bottom of the pool, following the manufacturer's instructions.
- Coating: Vinyl is a practical and economical option. However, for greater durability, consider coverings such as tiles or tiles.
Finishing and Finalization
Finally, we tamped the ground well and applied a layer of 5/16 iron to the top of the beach. The entire process was done to ensure that the structure was robust and safe.
- Finishing of the little beach: Complete the beach with a layer of 5/16 iron on top for stability.
- Final Cleaning: Clean the pool and remove any debris before filling with water.
Total Cost of Materials
- Blocks: R$ 1.100
- Cement: R$ 860
- Iron 5/16: R$ 500
- Stirrups: R$ 200
- Coarse Sand: R$ 120
- Stone 1/4: R$ 140
The total cost of materials was R$ 2.920.
Additional Tips and Suggestions
- Choose Quality Materials: Choosing good quality materials can make all the difference in the durability of your pool.
- Consider the Coating: Although vinyl is a cheaper and more practical option, consider investing in tiles or mosaics if you want a more resistant and long-lasting structure.
- Plan the Filtration System: A good filtration system is essential to keep water clean and healthy.
- Regular Maintenance: Perform regular pool maintenance to avoid future problems and ensure its longevity.
Frequently Asked Questions
1. What is the ideal depth for a masonry pool?
The ideal depth depends on the use. For recreational use, 1.40m is sufficient. If you want a pool for diving, consider greater depths.
2. Do I need permission to build a swimming pool at home?
Yes, you need to check your city's rules and regulations regarding residential construction. Check with your local city hall to obtain the necessary permits.
3. What is the best time of year to build a swimming pool?
The drier months are ideal, avoiding problems with rain that can delay the construction. Planning the construction during spring or summer can be a good idea.
4. How long does it take to build a masonry pool?
Construction time can vary, but on average it takes between 2 and 3 months, depending on the weather and the pace of work. Make sure you have all the materials and a team ready to speed up the process.
5. Can I build the pool myself?
It is possible, but it is recommended to have the help of professionals to ensure the safety and quality of the work. Having experienced engineers and bricklayers can avoid mistakes and ensure a satisfactory end result.
6. How do I choose the best location on my land for the pool?
Choose a location with good sunlight, away from large trees to avoid leaves and dirt in the water, and consider proximity to the filtration system. A flat, well-drained area is ideal.
Did you like this amazing tip? If so, share it with your friends and on your social networks. Leave your comment below and your suggestions. Receive it daily here on our website. Blog of ideas and tips free and follow us on Google News too. Thank you!