
Are you tired of that old, dull, and boring flooring in your home? Imagine renovating your space using a cheap floor, without breaking anything, without mess and quickly. Sounds like a dream, doesn't it? Today, I'm going to show you how to transform an old floor into a modern one monolithic floor, with a simple and economical technique.
This is the perfect solution for those looking for practicality and an impeccable finish. We will use a special cement that levels the floor, covering imperfections and grout, leaving an incredible result. Get ready to learn a technique that will revolutionize the look of your space!
Step by Step Guide to Transforming Your Old Floor with a Cheap Floor
Preparing the Floor
Before you begin the renovation, it is essential to properly prepare the old floor. First, make sure it is clean and free of any dust or debris. The adhesion promoter will be applied to ensure that the cement sets properly.
- Deep Cleaning: Use a vacuum cleaner or a broom to remove all dirt. Any residue can compromise the adhesion of the cement.
- Necessary Repairs: Check the floor for cracks or holes. Fill these areas with a suitable repair compound and let it dry completely.
Application of Adhesion Promoter
To promote good adhesion of the cement, we will use Ultra Gripe from Pro-fix. This product is excellent for any smooth surface, ensuring that the cement does not come loose over time. Apply the promoter with a roller from the inside out and wait about 40 minutes for it to dry.
- Selection of Promoter: Make sure you choose a high-quality adhesion promoter. Ultra Gripe is an excellent option, but there are others on the market that are also effective.
- Uniform Application: Apply the product evenly to ensure that all areas of the floor receive the necessary treatment.
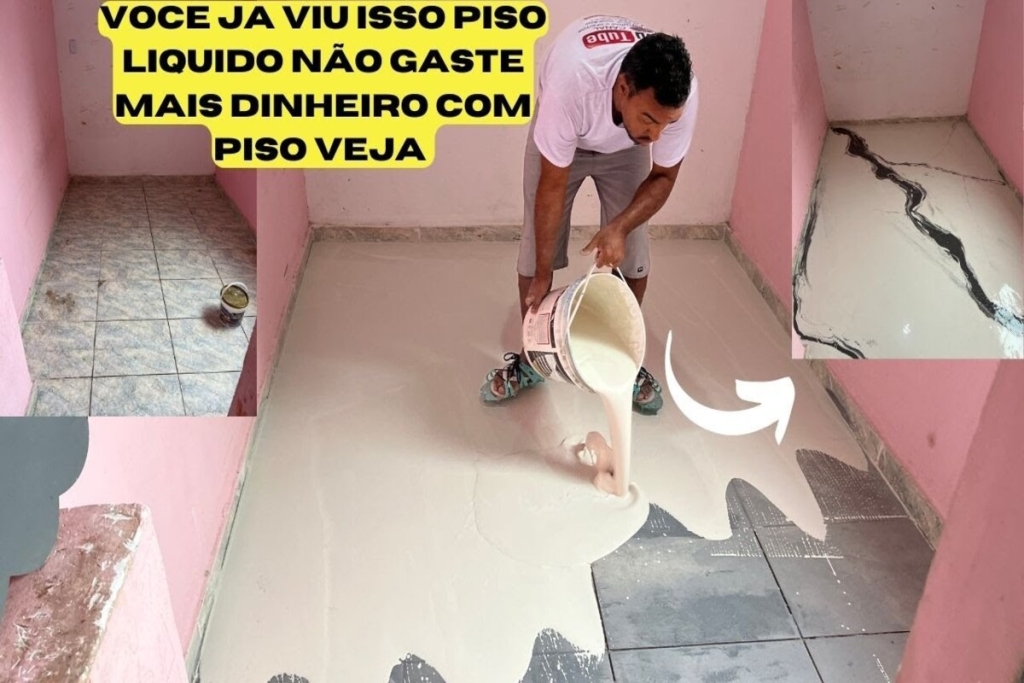
Mixing and Applying Self-Leveling Cement
We will use Drive self-leveling cement, which has a basic white color, but can be pigmented to your taste. Mix four and a half liters of water for each 20 kg bag of cement. Once well mixed, pour the cement over the floor and spread it with a squeegee, maintaining a uniform thickness of 3 mm.
- Correct Proportion: Follow the manufacturer's instructions to ensure correct mixing. The ratio of water to cement is crucial to the quality of the final result.
- Consistent Spreading: Use the squeegee to spread the cement evenly, avoiding thicker or thinner areas.
Smoothing and Leveling
Once the cement is spread, use a foam roller to smooth the surface and remove any air bubbles. This will ensure that the floor is perfectly smooth and level. It is important to wear cleated shoes so that you can walk on the cement without leaving marks.
- Appropriate Tools: A foam roller is ideal for this job as it helps remove bubbles and ensure a smooth surface.
- Nail Shoes: Essential to avoid leaving marks on the fresh cement while you work.
Personalization with Pigmentation
If you wish, you can add pigments to the cement to create a marbled effect or choose another color that matches your environment. After applying the cement, create veins and designs with pigment to give your floor a special and personalized touch.
- Pigment Selection: Existem várias opções de cores e efeitos. Escolha de acordo com a decoração do seu ambiente.
- Application Technique: Use disposable cups or other tools to create veins and designs in the still-wet cement.
Finishing and Drying
After all the work, the floor needs to dry to the touch for 24 hours and seven days to fully cure. After this period, you can apply a layer of polyurethane varnish or water-based acrylic resin to protect and add shine to the floor.
- Drying Time: Respect the recommended drying times to avoid future problems.
- Finish: Apply a layer of varnish or resin to protect the floor and ensure a long-lasting shine.
Frequently Asked Questions
1. Can I apply this technique to any type of floor?
Sim, a técnica pode ser aplicada em pisos de cerâmica, porcelanato, e até mesmo concreto, desde que a superfície esteja limpa e nivelada.
2. How long does it take to complete the entire process?
The application process takes just a few hours, but you must wait 24 hours for it to dry to the touch and seven days for the cement to fully cure.
3. Do I need special equipment to apply self-leveling cement?
Basic equipment includes a bucket, squeegee, foam roller, and nail shoes. A cement mixer also makes the job easier.
4. Is self-leveling flooring durable?
Yes, self-leveling flooring is quite durable and resistant, ideal for high-traffic areas.
5. Can I choose the color of the cement?
Yes, self-leveling cement can be pigmented in different colors, allowing you to customize the finish according to your taste.
6. Do I need to hire a professional to do the application?
Not necessarily. With the right guidance, it is possible to do the application yourself, but hiring a professional can ensure a perfect finish.
Did you like this amazing tip? If so, share it with your friends and on your social networks. Leave your comment below and your suggestions. Receive it daily here on our website. Blog of ideas and tips free and follow us on Google News too. Thank you!